Claim Your Free Estimate Today
Step-by-Step Guide to Planning a Custom Kitchen Remodel
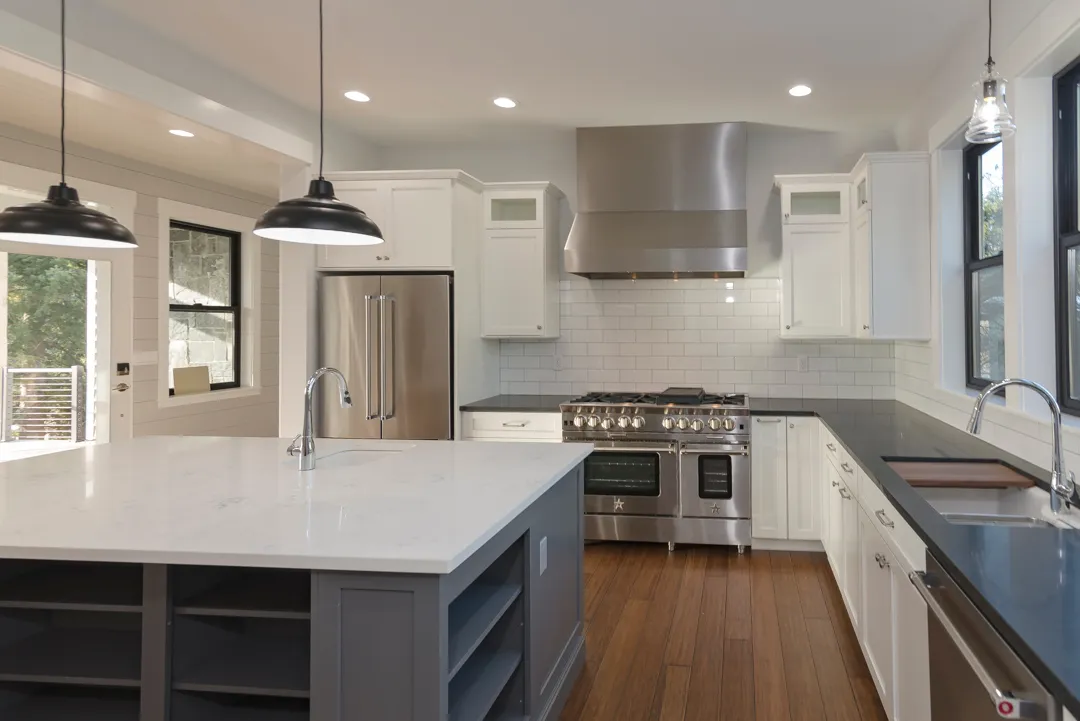
Step 1: Define Your Vision and Set a Realistic Project Budget
Before selecting materials or scheduling contractors, take time to clarify what you want from your new kitchen space. Start by gathering inspiration from design magazines, online galleries, and showrooms, then narrow your focus to specific features that align with your household’s daily routines. Consider how you use your kitchen now and how you’d like that experience to improve. Do you need more counter space for meal prep? Better storage solutions? An island for casual dining or homework sessions?
In Anacortes, many homeowners discover that their kitchen priorities shift with the seasons. Summer brings fresh seafood and farmers market produce that demand ample prep surfaces and organized storage, while winter months make a well-lit, efficient cooking space even more valuable during darker days. Think about your entertaining style, too. Waterfront homes often benefit from layouts that flow naturally toward outdoor dining areas, while older neighborhoods may call for designs that preserve character while adding functionality.
Once you’ve identified your must-haves, establish a realistic budget that accounts for both visible upgrades and hidden necessities. Allocate funds across cabinetry, countertops, appliances, flooring, lighting, and labor, leaving a contingency reserve of 10-15% for unexpected discoveries once walls open up. Many remodels in older Anacortes homes reveal original framing that needs reinforcement or outdated wiring that requires updating to current codes. Setting aside buffer funds from the start prevents stressful decisions mid-project and ensures you can complete the work properly without compromising on safety or quality.
Step 2: Select Durable Materials That Match Your Lifestyle Needs
Material selection shapes both the look and longevity of your kitchen remodel. Countertops see daily use and need to withstand heat, moisture, and regular cleaning, making durability as important as appearance. Granite and quartz both offer excellent performance, with granite providing unique natural patterns and quartz delivering uniform color and low maintenance. In coastal Anacortes, moisture resistance matters more than in drier climates, so sealed stone surfaces and water-resistant cabinetry finishes help protect your investment against humidity from marine air.
Cabinet construction and finish determine how your kitchen feels every time you open a drawer or close a door. Solid wood frames with dovetail joinery outlast particleboard alternatives, and soft-close hardware adds a level of refinement that becomes more appreciated over time. Door styles range from traditional raised panels to sleek flat-front contemporary designs, and your choice should complement your home’s existing architecture. Many Anacortes homeowners working with Craftsman-era homes find that Shaker-style cabinet doors honor the home’s character while providing a clean, timeless look that won’t feel dated in ten years.
Flooring and backsplash tiles complete the material palette. Porcelain and ceramic tiles offer excellent moisture resistance and come in endless patterns, from classic subway tile to intricate mosaics. Hardwood brings warmth but requires proper sealing in kitchens prone to spills, while luxury vinyl replicates wood grain at a lower cost with superior water resistance. When coordinating finishes, carry samples between lighting conditions in your home, since natural light from north-facing windows reads differently than south-facing exposures. Visit local showrooms to see full installations rather than relying solely on small samples, and don’t hesitate to request material specifications to compare warranty coverage and maintenance requirements across options.
Step 3: Design a Workflow That Supports How You Cook Daily
The most beautiful kitchen falls short if the layout disrupts your cooking routine. Start by analyzing the work triangle, the relationship between your sink, stove, and refrigerator. Efficient designs keep these three points close enough for easy movement but far enough apart to prevent congestion when multiple people cook together. Islands add valuable counter space and can house a secondary sink or cooktop, but they need adequate clearance on all sides. A minimum of 42 inches allows comfortable passage, while 48 inches accommodates simultaneous activity when someone works at the island and another person moves behind them.
Storage planning separates functional kitchens from frustrating ones. Take inventory of your cookware, small appliances, pantry staples, and serving pieces, then design cabinet interiors to accommodate them. Pull-out shelves, drawer dividers, corner lazy susans, and vertical tray storage maximize usable space and prevent items from disappearing into dark cabinet corners. In Anacortes, where many homes feature charming vintage layouts with limited square footage, creative storage solutions become essential. Floor-to-ceiling cabinets capture vertical space, and installing shallow pantry pull-outs in narrow gaps between appliances transforms otherwise wasted areas into valuable storage.
Lighting deserves equal attention during the layout phase. Overhead fixtures provide ambient light, but task lighting under cabinets and over islands ensures you can see clearly while chopping vegetables or reading recipes. Windows bring natural light and views, and positioning your sink beneath a window makes dishwashing less tedious while taking advantage of Anacortes’ waterfront scenery or garden outlooks. Pendants over islands serve both functional and decorative purposes, and dimmer switches allow you to adjust brightness for different activities. Sketch your layout to scale, marking electrical outlets, switch locations, and light fixtures before construction begins, since relocating wiring after drywall installation adds unnecessary cost and delays.
Step 4: Schedule Each Phase to Minimize Disruption to Your Home
Once design decisions are finalized and materials ordered, the physical transformation begins. A well-coordinated installation sequence prevents delays and protects finished surfaces from damage. Demolition comes first, removing old cabinets, countertops, and flooring to expose the underlying structure. This stage often reveals issues that weren’t visible during planning, such as water damage around old sinks or outdated electrical panels that need upgrading. Addressing these discoveries promptly keeps the project moving forward and ensures your new kitchen rests on a solid foundation.
Rough-in work follows demolition, with plumbers and electricians installing new supply lines, drain pipes, and wiring before walls close back up. This stage determines where outlets, switches, and fixtures will live, so confirm locations match your layout drawings. Many Anacortes homeowners appreciate adding a few extra outlets for countertop appliances and USB charging ports for devices, since these conveniences are easier to install during construction than afterward. Once inspections pass and drywall installation completes the wall surfaces, cabinet installation begins. Precision matters here, since even minor misalignment affects how doors close and how countertops fit.
Countertop installation typically waits until cabinets are secured and level, allowing fabricators to template exact measurements for a perfect fit. Granite and quartz installations require skilled handling to avoid chips or cracks, and seams should align with your layout plan to minimize visibility. Backsplash tile work follows countertop installation, with careful attention to grout lines and spacing. Flooring comes near the end to prevent damage from foot traffic and dropped tools during earlier phases. Final touches include hardware installation, appliance hookups, trim carpentry, and thorough cleaning. Anacortes weather patterns mean spring and early fall offer the most predictable conditions for remodels, with fewer weather-related delays and comfortable temperatures when your home’s exterior access points remain open during construction. Expect most custom kitchen remodels to span six to ten weeks from demolition to completion, depending on scope and material lead times, and maintain regular communication with your team to stay informed about progress and any adjustments needed along the way.
Protect Your Investment With Proper Care and Maintenance Planning
Once design decisions are finalized and materials ordered, the physical transformation begins. A well-coordinated installation sequence prevents delays and protects finished surfaces from damage. Demolition comes first, removing old cabinets, countertops, and fixtures while protecting flooring and walls in adjacent rooms. Electrical and plumbing rough-ins follow, updating wiring for new appliance locations and repositioning water lines before walls close up.
In Anacortes, many homeowners schedule major remodeling work during late spring and summer when they can grill outdoors and set up temporary kitchens on covered patios. Milder weather allows windows to stay open for ventilation during painting and finishing work, and longer daylight hours give installation teams more productive time each day. Planning around the school calendar also helps families maintain routines, with most disruptive phases completed before fall activities resume.
Cabinet installation anchors the timeline, as these units must be securely mounted and leveled before countertop templating can begin. Confirming lead times early keeps the project on schedule. Once cabinets are in place, countertop fabricators take final measurements, accounting for any slight variations between the plan and the actual installation.
Tile work comes next, with backsplashes installed after countertops to ensure clean alignment at the seam. Grout needs 24 to 48 hours to cure before sealing, so this phase builds in short waiting periods that installers can use for trim carpentry, hardware mounting, and fixture hookups. Final electrical and plumbing connections happen last, bringing appliances online and testing all water fixtures for leaks. A final walkthrough with your installation team confirms that every detail meets your expectations before you begin using the space.
Effective project management keeps subcontractors moving in the right order and prevents costly rework. Clear communication about material deliveries, access requirements, and household schedules helps everyone stay aligned, turning careful planning into a finished kitchen that exceeds your original vision.